VMware esxi command : esxcli

  1. esxcli hardware ipmi sdr list //取得感應器資訊

  2. esxcli system process stats load get //取得目前負載狀況

參考

Posted in VMware | Leave a comment

VMware vCenter 的 Hardware Status Tab消失或是無法取得硬體資訊

有幾個做法
1. 確認 vCenter 的 Plug-ins
Plug-ins 工具列 => Manage Plug-ins
確認
(1) vCenter Hardware Status 的狀態是否為 Enable,若沒有就啟動他吧
(2) vCenter Service Status 的狀態是否為 Enable,若沒有就啟動他吧

  1. 檢查 host 上的 sfcbd-watch 服務是否正常
    /etc/init.d/sfcbd status
    若沒有,可試著重啟 hosts 的 service
    /sbin/services.sh restart

  2. 重啟 CIM 服務
    從 vCenter 進入 => Host主機 => Configuration => Security Profile => Firewall Properties => CIM Server => Restart

  3. 如果只是無法更新資訊
    Hardware Status => Reset sensors

就大概以上幾點做法Orz

Posted in VMware | Leave a comment

OpenVPN 備援路由

先確認網路卡組態設定
第一張網卡 eth0 有設定 gateway
第二張網卡 eth1 沒有設定 gateway
這樣啟動時網路路由只有第一組的預設路由

接著編輯/etc/rc.locl 加入下面兩個設定

開機時自動加入第二組路由

route add default gw ..*.254 dev eth1 metric 10

調整備援路由切換時間,預設300

echo “10” > /proc/sys/net/ipv4/route/gc_timeout

最後可以檢查路由表
[root@twaren3-132 ~]# route -n
Kernel IP routing table
Destination Gateway Genmask Flags Metric Ref Use Iface
10.1.0.2 0.0.0.0 255.255.255.255 UH 0 0 0 tun0
203.145.203.0 0.0.0.0 255.255.255.0 U 0 0 0 eth1
163.28.192.0 0.0.0.0 255.255.255.0 U 0 0 0 eth0
10.1.0.0 10.1.0.2 255.255.0.0 UG 0 0 0 tun0
169.254.0.0 0.0.0.0 255.255.0.0 U 0 0 0 eth1
0.0.0.0 163.28.192.254 0.0.0.0 UG 0 0 0 eth0
0.0.0.0 203.145.203.254 0.0.0.0 UG 10 0 0 eth1

Posted in Linux, OpenVPN | Leave a comment

匯出Google行事曆

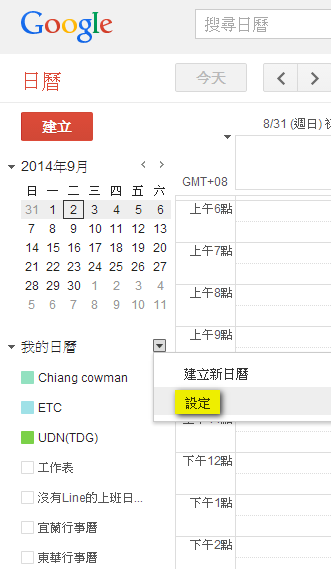
  1. 我的日曆 => 設定
    2014-09-02_175437

  2. 匯出日曆
    2014-09-02_175754

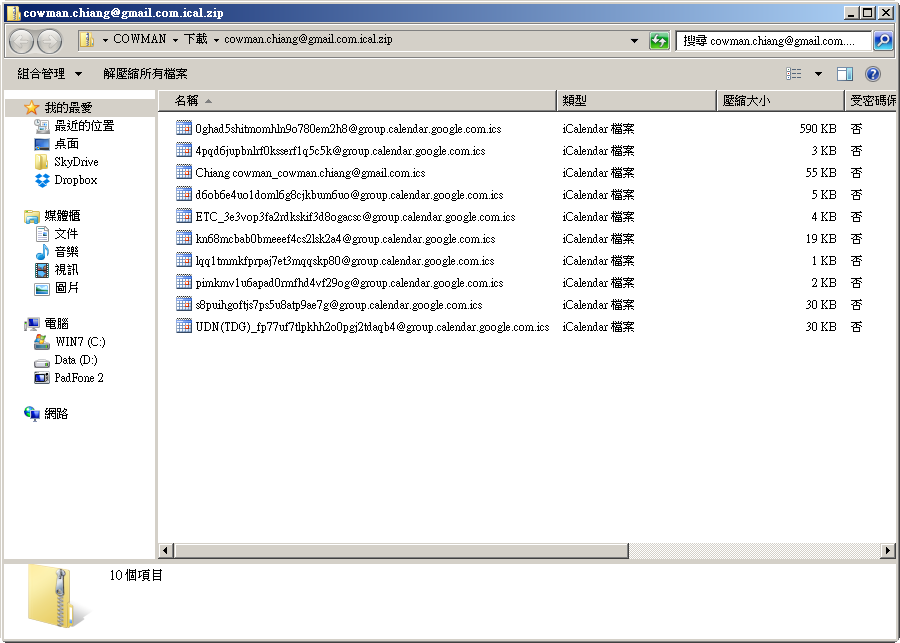
  3. 匯出的日曆檔案資訊
    2014-09-02_175844

Posted in Calendar | Leave a comment

OBS Remote Webclient 修正為可帶通訊埠資訊

在研究 OBS (Open Broadcaster Software) 時意外發現了一個好用的 Plugin OBS Remote
其用意主要就是當OBS安裝了Plugin後~可以透過手機APP、Web等環境經由WebSocket的方式進行控制
預設走的Port是TCP 4444,如果需要改Port的話就必須要改一下語法了

//原本的 js / websocket.js 檔案
function connectWebSocket(host)
{
  connectingHost = host;

  var url = "ws://" + connectingHost + ":4444";

  console.log("trying to connect to: " + url);
  if (typeof MozWebSocket != "undefined") 
  {
    socket_obsapi = new MozWebSocket(url, "obsapi");
  } 
  else 
  {
    socket_obsapi = new WebSocket(url, "obsapi");
  }

  try {
    socket_obsapi.onopen = _onWebSocketConnected;
    socket_obsapi.onmessage = _onWebSocketReceiveMessage;
    socket_obsapi.onerror = _onWebSocketError;
    socket_obsapi.onclose = _onWebSocketClose;
  } catch(exception) {
    alert('

Error' + exception); } }

//修改後的 js / websocket.js 檔案
function connectWebSocket(host)
{
  var n = host.indexOf(":");
  //console.log(n.toString());
  if (n == -1)
  {
    console.log("沒有帶port資訊");
    connectingHost = host;
    var url = "ws://" + connectingHost + ":4444";
  }
  else
  {
    console.log("有帶port資訊");
    var hosts = host.split(":");
    connectingHost = hosts[0];
    var url = "ws://" + connectingHost + ":" + hosts[1];
  }

  console.log("trying to connect to: " + url);
  if (typeof MozWebSocket != "undefined")
  {
    socket_obsapi = new MozWebSocket(url, "obsapi");
  }
  else
  {
    socket_obsapi = new WebSocket(url, "obsapi");
  }

  try {
    socket_obsapi.onopen = _onWebSocketConnected;
    socket_obsapi.onmessage = _onWebSocketReceiveMessage;
    socket_obsapi.onerror = _onWebSocketError;
    socket_obsapi.onclose = _onWebSocketClose;
  } catch(exception) {
    alert('

Error' + exception); } }

Posted in OBS | Leave a comment

Iframe 允許 fullscreen

礙於某些原因,更改css有點麻煩…..
所以就直接使用iframe把別人做好的網頁樣版包起來排版
這將就方便許多了!!

只是這次包的是player,那全螢幕????
查了一下~可以用下列方法達成

allowFullScreen="true" webkitallowfullscreen="true" mozallowfullscreen="true"

只是這個方法對ie…..沒用!

Posted in HTML | Leave a comment

Nginx RTMP Module Stat

  1. 將 RTMP 模組檔案解壓縮後的 stat.xsl 複製到網頁目錄
wget https://github.com/arut/nginx-rtmp-module/archive/master.zip
unzip master.zip
cp nginx-rtmp-module-master/stat.xsl /usr/local/nginx/html/.
  1. 編輯 Nginx 設定檔,加入 stat 網頁設定
        location /stat {
            rtmp_stat all;
            rtmp_stat_stylesheet stat.xsl;
        }

        location /stat.xsl {
            root html;
        }
  1. 重新讀取設定檔

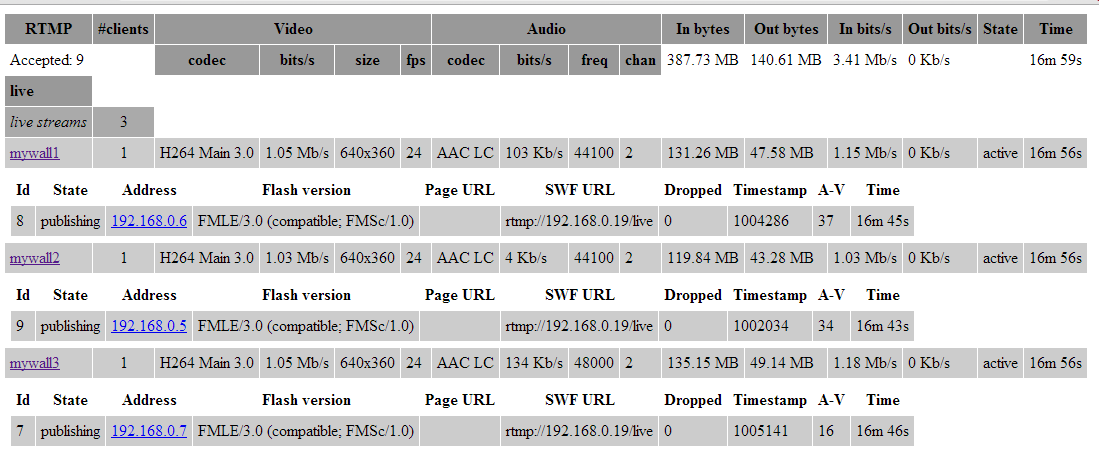
  2. 連結網頁 http://[ip]/stat
    20140901

參考 : https://github.com/arut/nginx-rtmp-module

Posted in Nginx, RTMP | Leave a comment

使用 Windows 內建 netsh 進行 Port Forwarding

  1. 將 local listen 的 610 port 轉發至 10.201.80.94 的 4444 port
    netsh interface portproxy add v4tov4 listenaddress=127.0.0.1 listenport=610 connectaddress=10.201.80.94 connectport=4444

  2. 將 1 建立的 rule 刪除
    netsh interface portproxy delete v4tov4 listenaddress=127.0.0.1 listenport=610

  3. 秀出目前建立的 rule
    netsh interface portproxy show all

Posted in Windows | Leave a comment

Nginx 存取設定 – http_auth_basic_module

編輯檔案 /usr/local/nginx/conf/nginx.conf

for http 模組

        location / {
            satisfy any;
            # satisfy 滿足條件
            # satisfy [all | any]
            # satisfy all => 下列條件都要滿足
            # satisfy any => 下列條件只要任一滿足就可以
            # 此處用到 http_access_module 及 http_auth_basic_module 兩個
            # 所以設定為any~任一滿足即可

            root   html;
            index  index.html index.htm;

            # ngx_http_access_module
            # 允許 10.201.80.107 瀏覽
            allow 10.201.80.107;
            # 其它來源不允許瀏覽
            deny all;

            # 其它來源使用帳密取得權限
            # ngx_http_auth_basic_module
            auth_basic "Restricted Area";
            # 設定跳出輸入帳號、密碼視窗的標題
            auth_basic_user_file    /usr/local/nginx/conf/.htpasswd;
            # 設定user file位置為/usr/local/nginx/conf/.htpasswd 
        }

安裝 apache2-utils

apt-get install apache2-utils

產生 htpasswd 檔案

# 第一次請加 -c
# htpasswd -c [user file位置] [帳號]
htpasswd -c /usr/local/nginx/conf/.htpasswd tdg
# 非第一次使用不加 -c
# htpasswd [user file位置] [帳號]
htpasswd /usr/local/nginx/conf/.htpasswd tdg

reload nginx conf就可以了~

Posted in Nginx | Leave a comment

iBeacon SDK

Estimote為成大推薦的iBeacon廠牌,目前在Github上可查到iOS跟Android的SDK
iOS => https://github.com/Estimote/iOS-SDK
Android => https://github.com/Estimote/Android-SDK

Posted in iBeacon, iOS | Leave a comment